
In:
The Bright Side
27th February 2022
Ashley Blackman takes a closer look at how restoring bright work and glazing on your bus or coach can transform the look of your finished restoration.
From a young age I have always loved polishing aluminum on the buses I owned, especially the hub caps and grill surround on a Regent V, that was and still is my favorite past time along with brush painting. This love of all things shiny and bling has influenced pretty much every vehicle purchase in my life. No seriously, I even have a chrome flask! So when restoring my clients vehicles it is usually a passion we share, making all the details as shiny as can be. So I am really pleased to be able to share this seemingly simple yet significant part of the restoration process that is bright work and glazing with you all.
Prioritising the tasks
Getting your window rubbers ordered and glazing cut to size is a pretty easy job to tick off the list due to there being plenty of great suppliers out there. However in my experience if you are outsourcing the bright work you need to locate a reputable company who can strip, polish and chrome plate items and often these suppliers have a waiting list of a month or so. If you are working to a tight deadline it is advisable that you get your polishing and chrome underway sooner rather than later. If your restoration is going to take years rather than months then you may not need to do this step until later on in the restoration project. It is worth noting too that if you are restoring a vehicle from the 80’s onwards you wont have as much bright work to restore because by this period most buses and coaches would have had rubberized windscreens and plastic badges etc.
The Bright Side
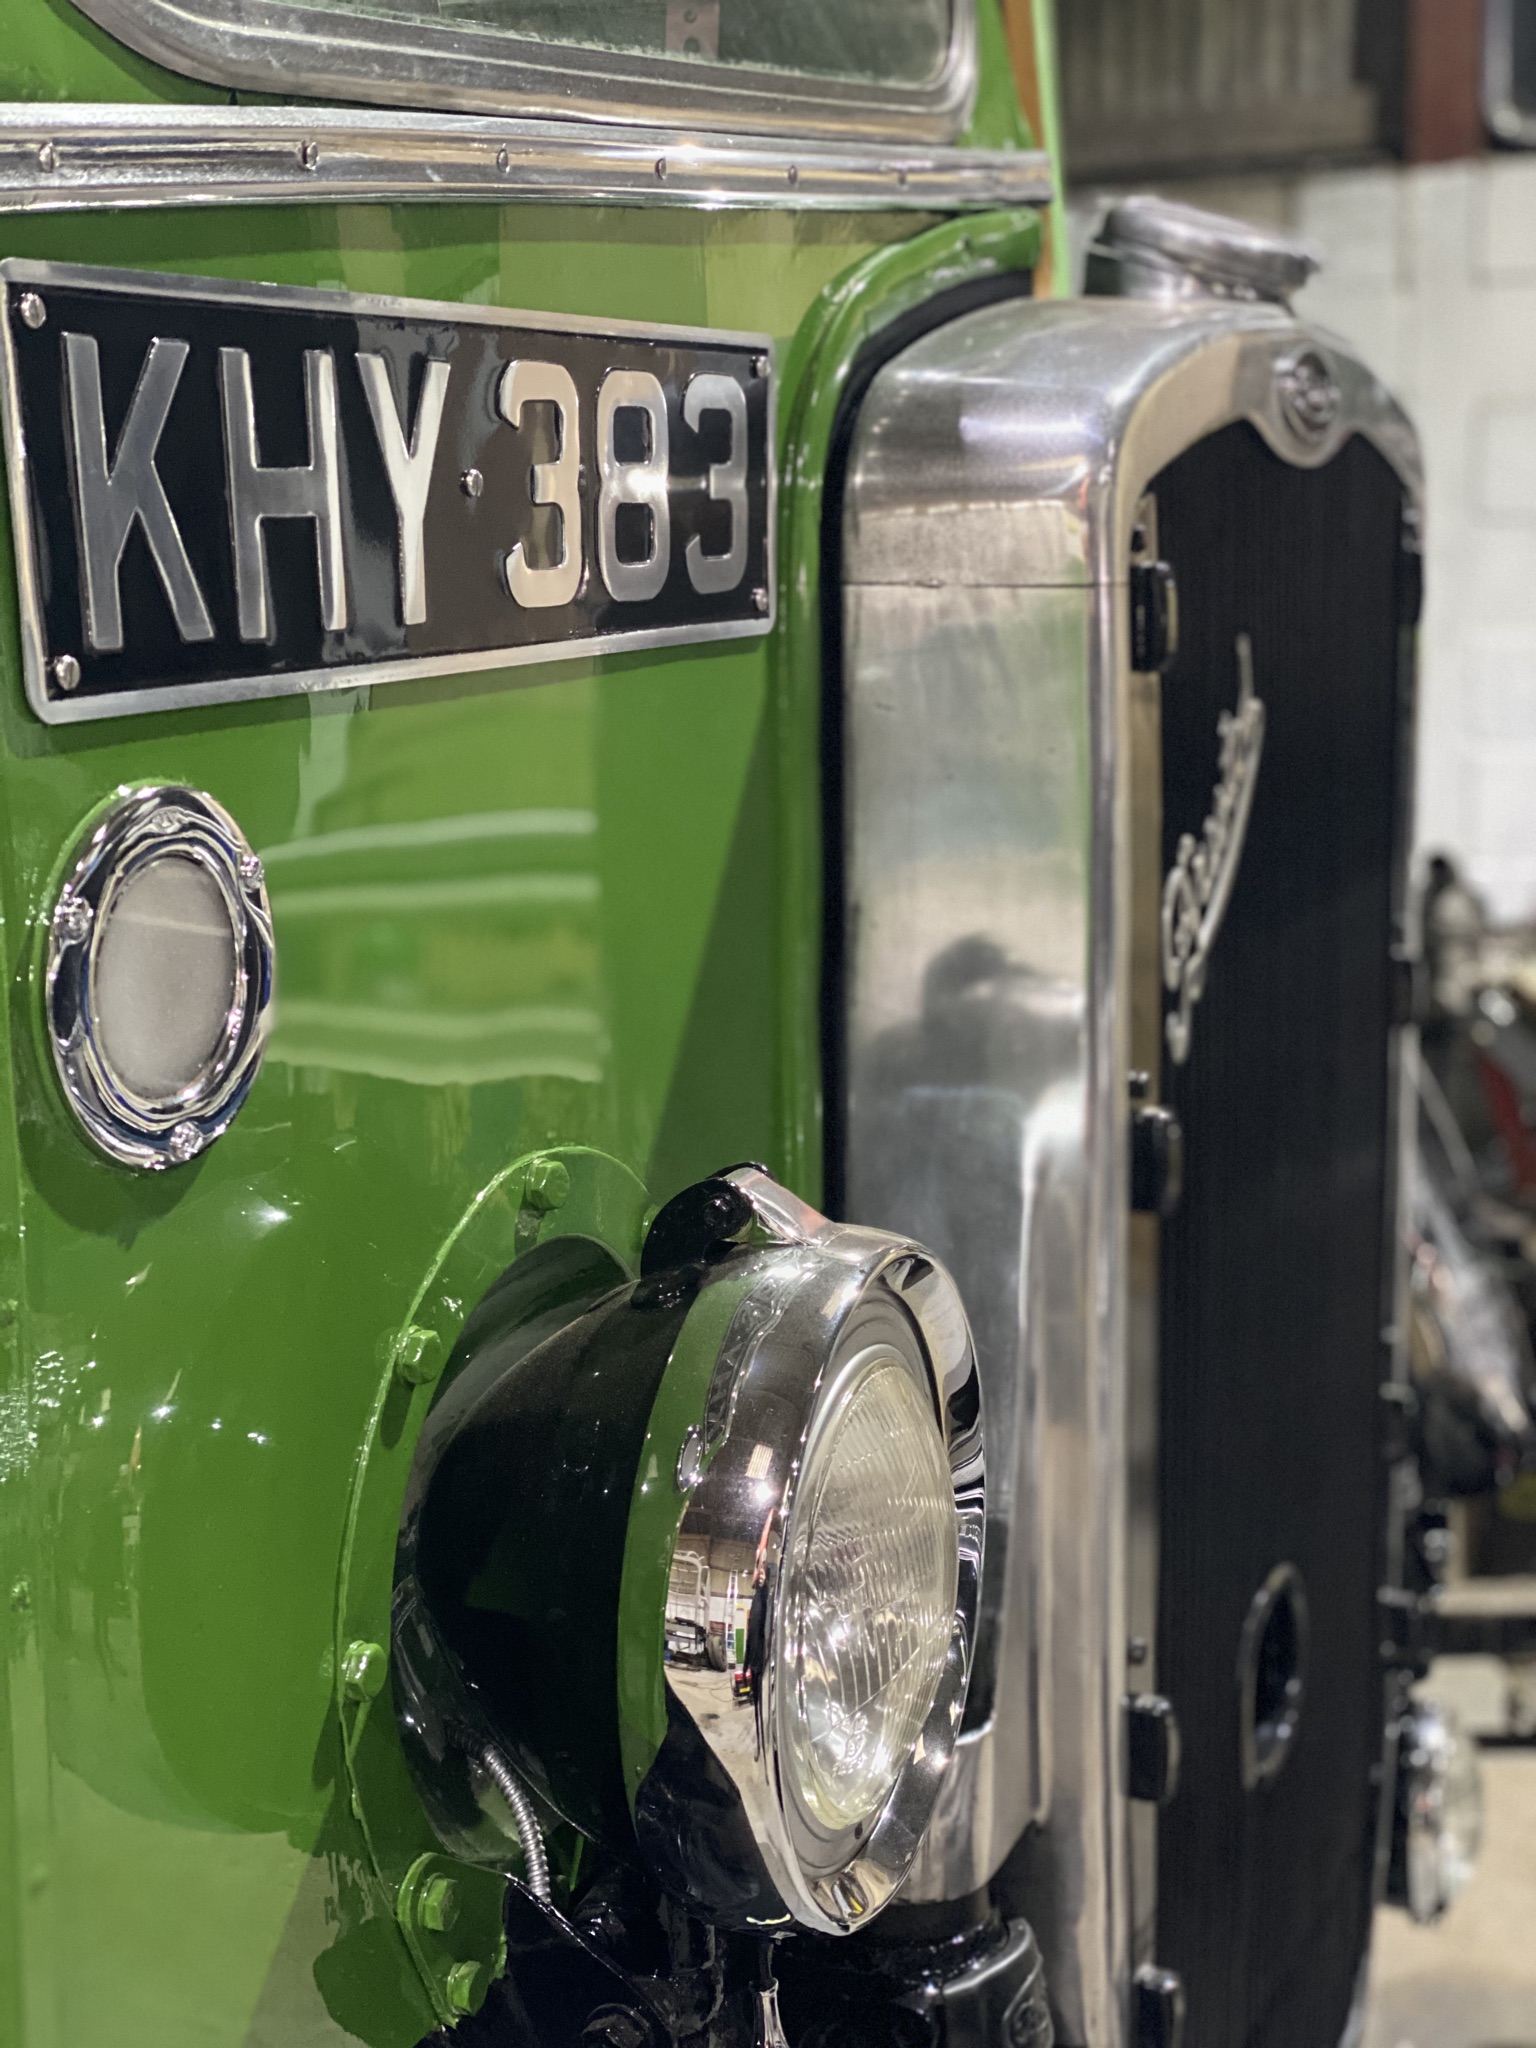
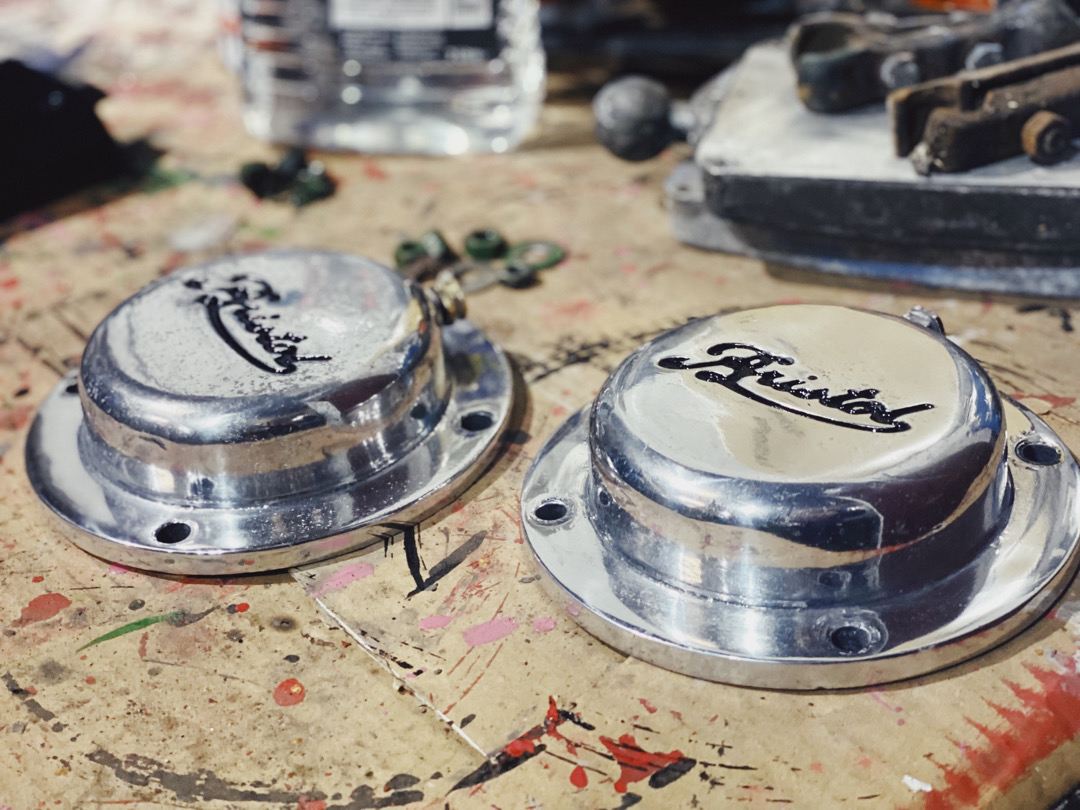
Most buses and especially coaches will have certain amount of polished chrome, stainless steel and aluminum externally and internally on the vehicle. To spot corroded aluminum this is generally dull and rough to touch. Stainless steel survives better over time as it does what is says on the tin. It doesn’t corrode but can tarnish but it does benefit from having a re-polish! Chrome depending on the quality of the coating can last a number of years before needing to be re-chromed, but over a long period of time it can craze into an ugly matte dull finish or even chip and flake off. Chrome doesn’t polish up like aluminum does, although you can remove a certain amount of tarnish and dirt by polishing. But if the shine has gone there is no way to get it back apart from having the part stripped and re-chrome plated by a professional.
Bright work items to be revamped often include beading, trim, handrails, seat frame tops, badges, pressed aluminum number plates, cab door handles, windscreen frames, headlight and sidelight rings, wheel nut guard rings, hub caps, coach beading, interior checker plate, aluminum radiators or chrome plated shells on exposed radiator buses and coaches.
When you come to removing some of these embellishments whilst restoring the bodywork, make sure to keep all of the parts labeled and stored safely as some badges and trim can be difficult, if not impossible to replace.
You might have already identified which items need brightening up, I always advise to get as many polished and re-chromed by a professional (unless you have your own equipment) as the budget allows because the finished mirror effect really is well worth it.
Polishing Tips
For those of you who have your own equipment or would like to have a go at polishing aluminum here are a few tips to help you along the way.
Take a look over the part you want to polish. The more corroded, rough and furry looking the more time it will take you to achieve a mirror finish. Make sure you have enough time to spend on this before you get started as it can be quite a tedious yet also rewarding task.
If you are happy to take on the challenge, take stock of the equipment you will need. You should have a handheld electric polisher with the correct wheel attachments, these usually consist of a soft buffing wheel and various grades of abrasive wheels and some good polishing paste such as Autosol or Mothers Polish.
First of all clean up the aluminum with the various grades of abrasive starting working your way from harsh to softer grades. When using the harsher grades this can leave scratches and marks but as you reduce the grade and use softer grades this will gradually smooth out the surface and finally use the buffer wheel with metal polish paste to achieve a mirror finish. The process is gently removing layers of aluminum, the more time you spend on this polishing process the more you will see mirror finish results. There are lots of tutorials on YouTube using different DIY equipment or you are welcome to email me info@ashleyblackman.co.uk if you have any questions.
Not Such A Pane
Windows are often overlooked and left in place and usually it is the window rubbers that need replacing. Over time window rubbers dry out, crack and leave black streaks down the windows and paintwork which isn’t a great look. Old, worn out window rubbers will also let water into your vehicle which can do damage over time. Fitting new window rubbers can be costly but I always try to encourage it especially when a client is having a bus or coach repainted. You always get a cleaner finish when new rubbers are fitted after a repaint and it is also the perfect time to change them if they aren’t the original authentic style or colour you want to achieve.
Replacement window rubbers I have always found easy to source thanks to coh-baines.co.uk having most styles available.
If you find you have some windows missing or cracked and you don’t have any spares then you will need to get new windows measured and cut by a professional window glazer/fitter. They will usually cut your window to size out of laminate safety glass. If you wanted toughened glass the professional you choose should be able to source this for you. If you don’t have any experience or confidence removing windows or working with glass then I don’t advise you try removing or refitting windows yourself due to the dangers involved when working with glass.
If all of your windows are present and it is just the rubbers that need changing then I advise you ask a professional to remove replace and refit the windows and rubbers for you at the stage when your bus or coach is being repainted. They should also be able to clean the windows and window frames up for you too, this is a service I provide for my clients so I am sure many others in the industry will offer the same.
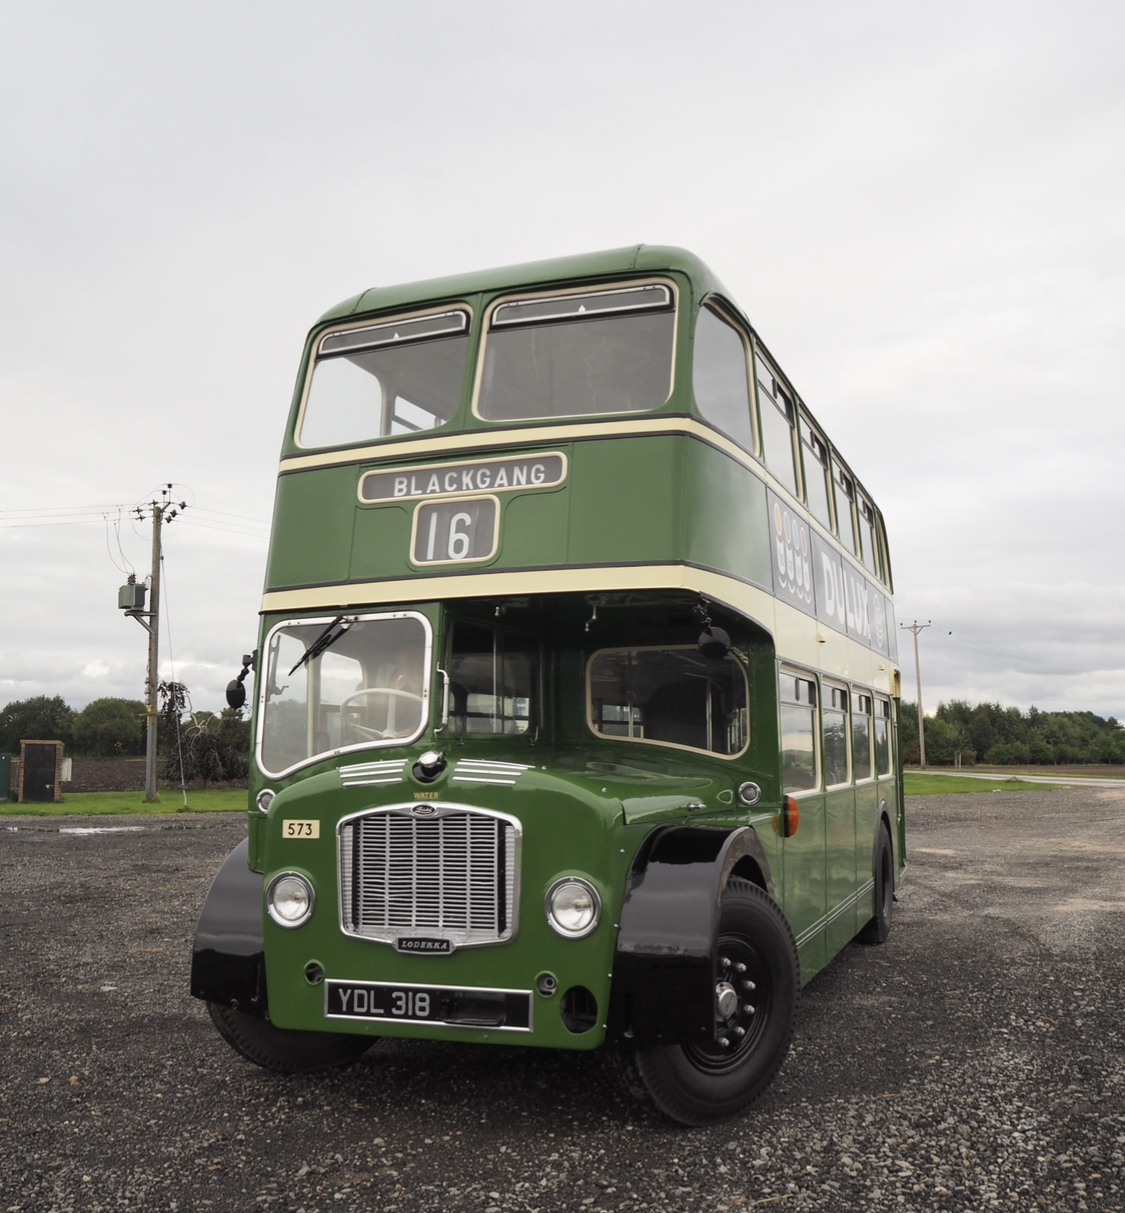
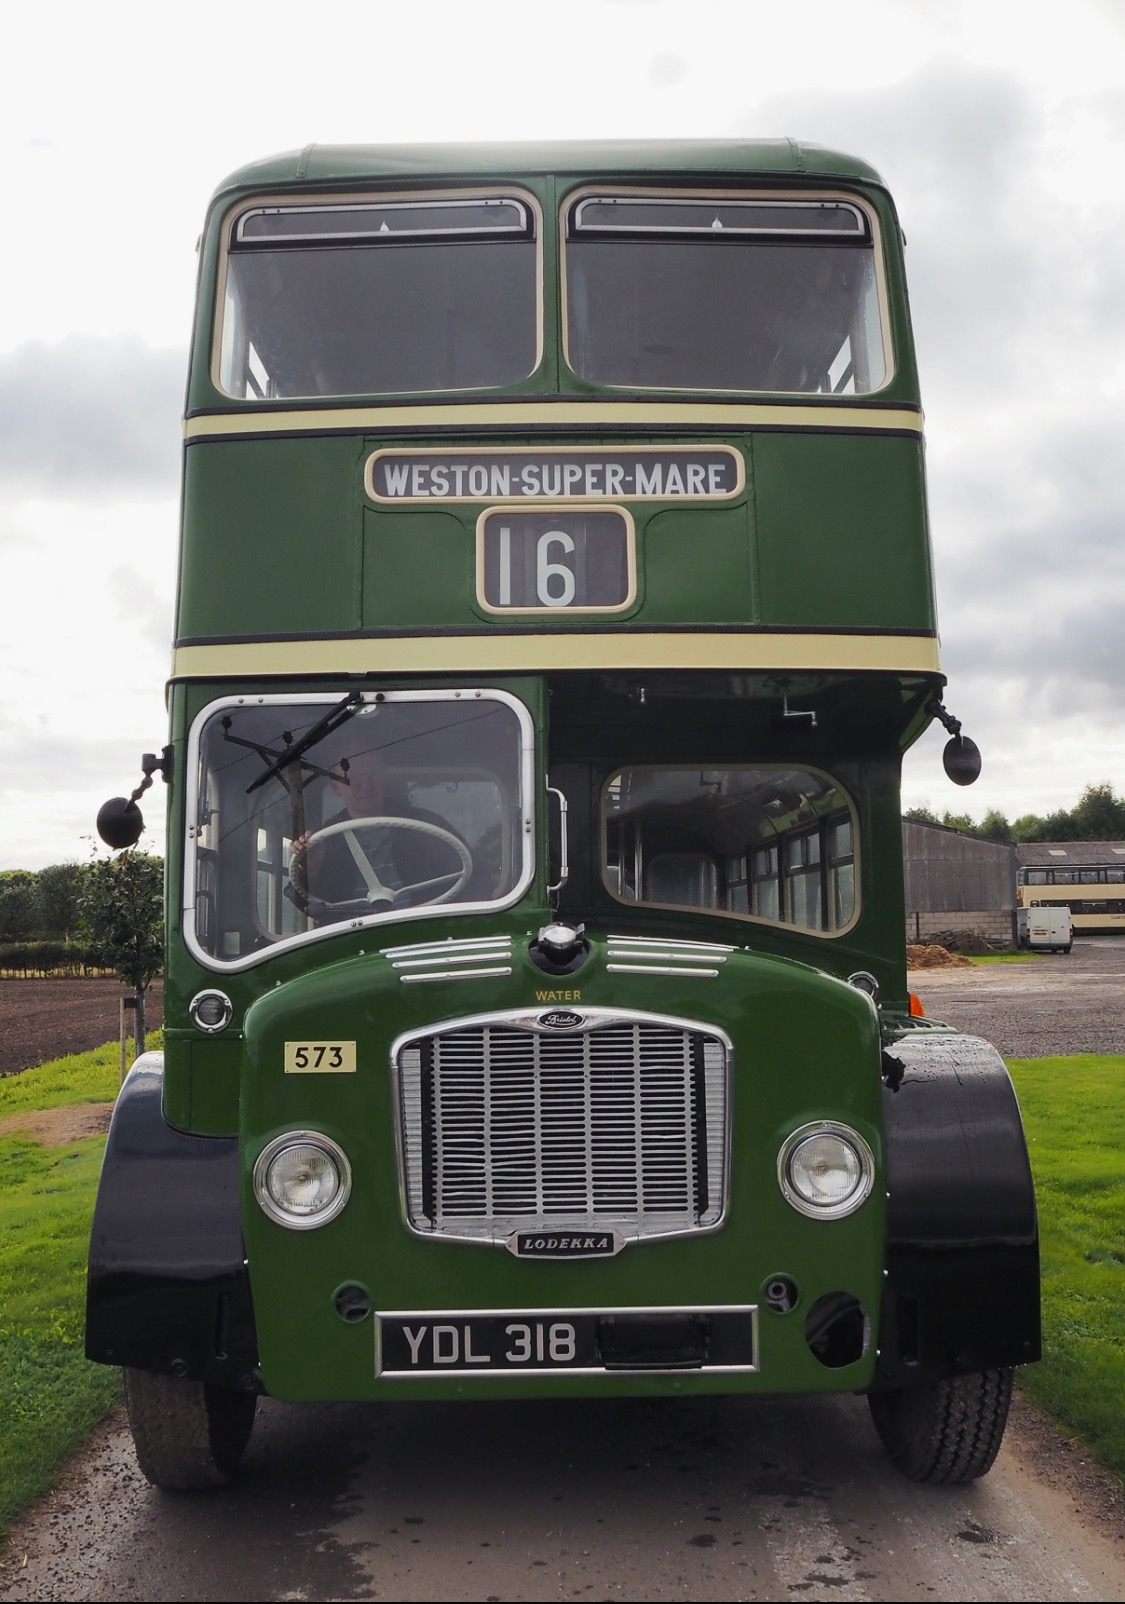
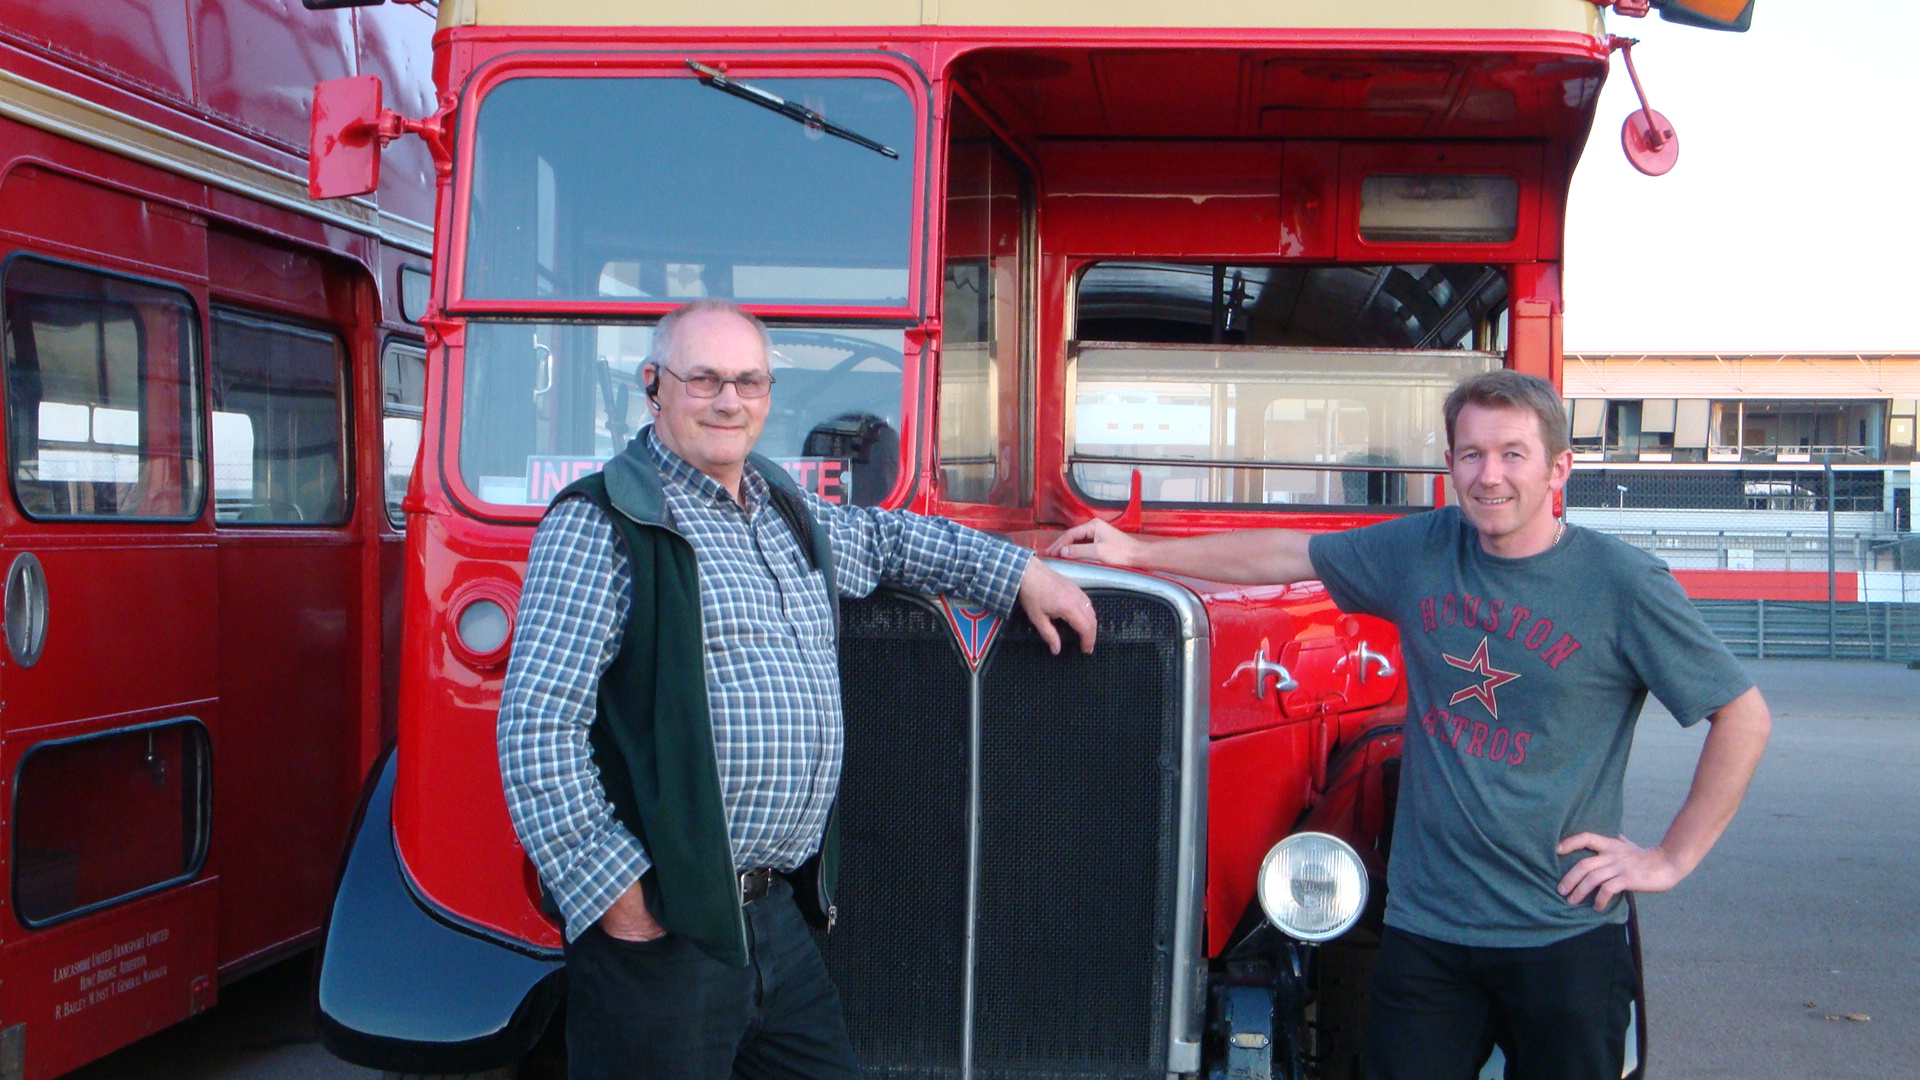
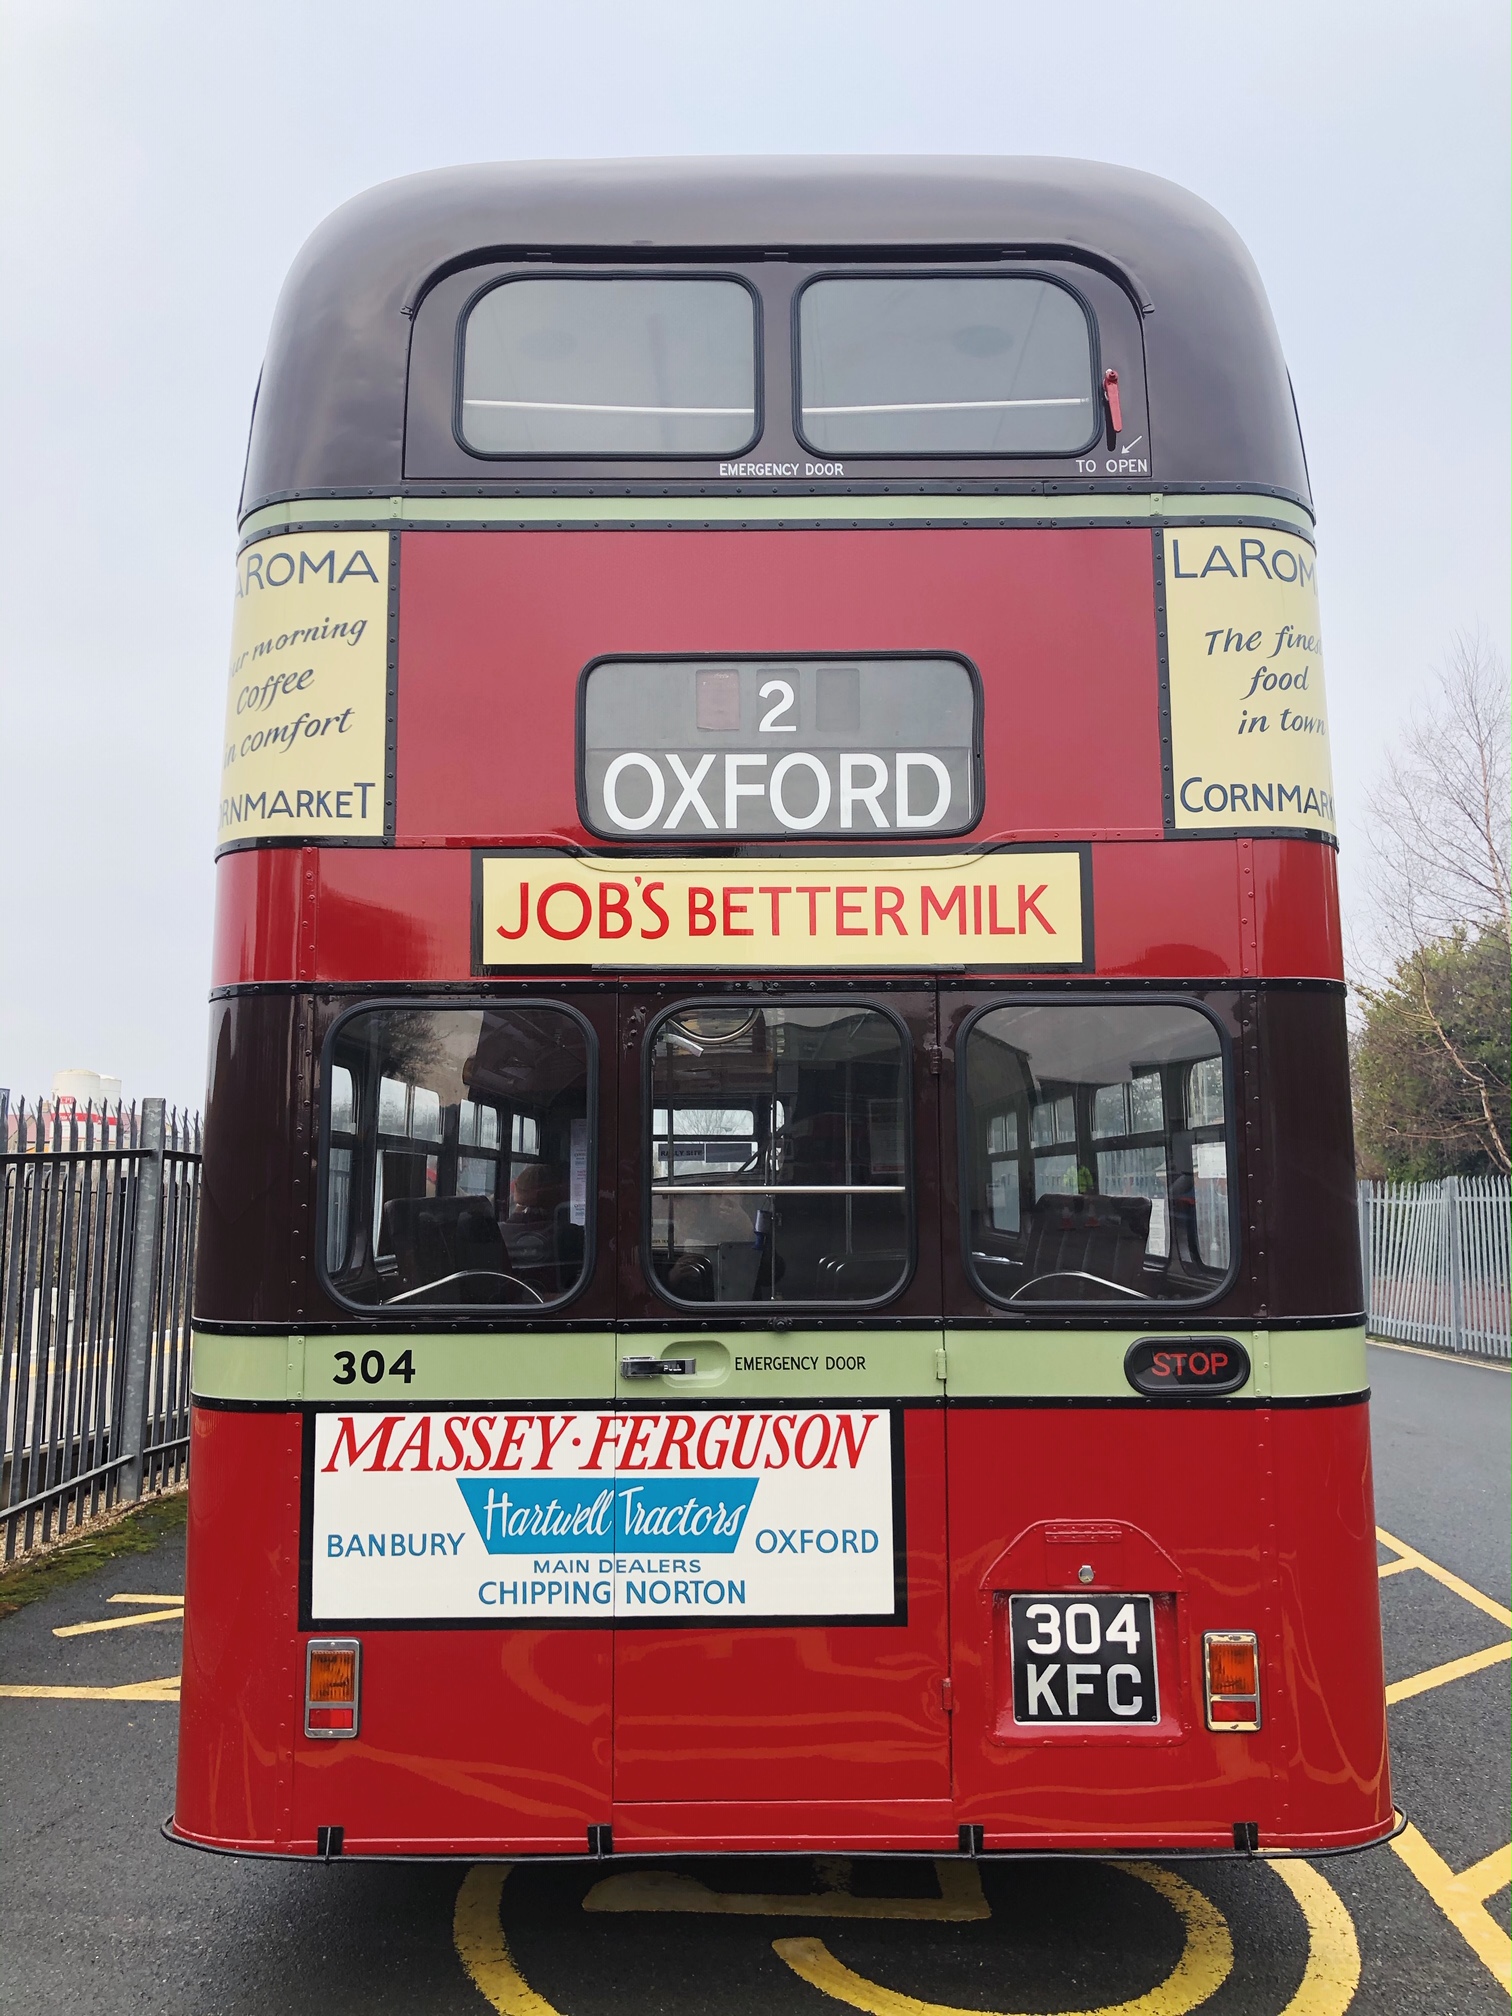
YDL 318
As a stunning example of how new window rubbers, bright work and a brush paint can transform a vehicle all of the images you see here in this article show off Jonathan Jones-Pratt’s gorgeous 1962 Bristol FS Lodekka, Southern Vectis, YDL 318 which I was lucky enough to restore partially last year.
Jonathan is a passionate collector of Bristol buses and is keen to make his collection as authentic and original as possible so wanted YDL to return to Western-Super-Mare after its partial restoration looking as it did when new with the addition of carefully chosen period adverts, incidentally matching its sister vehicle in preservation YDL 315.
YDL 318 started its life in 1962 on the Isle of Wight for The Southern Vectis Omnibus Company as fleet number 573 and so it seemed very fitting that it made its debut on the Isle of Wight, Buses, Beer & Walks Festival in October 2017.
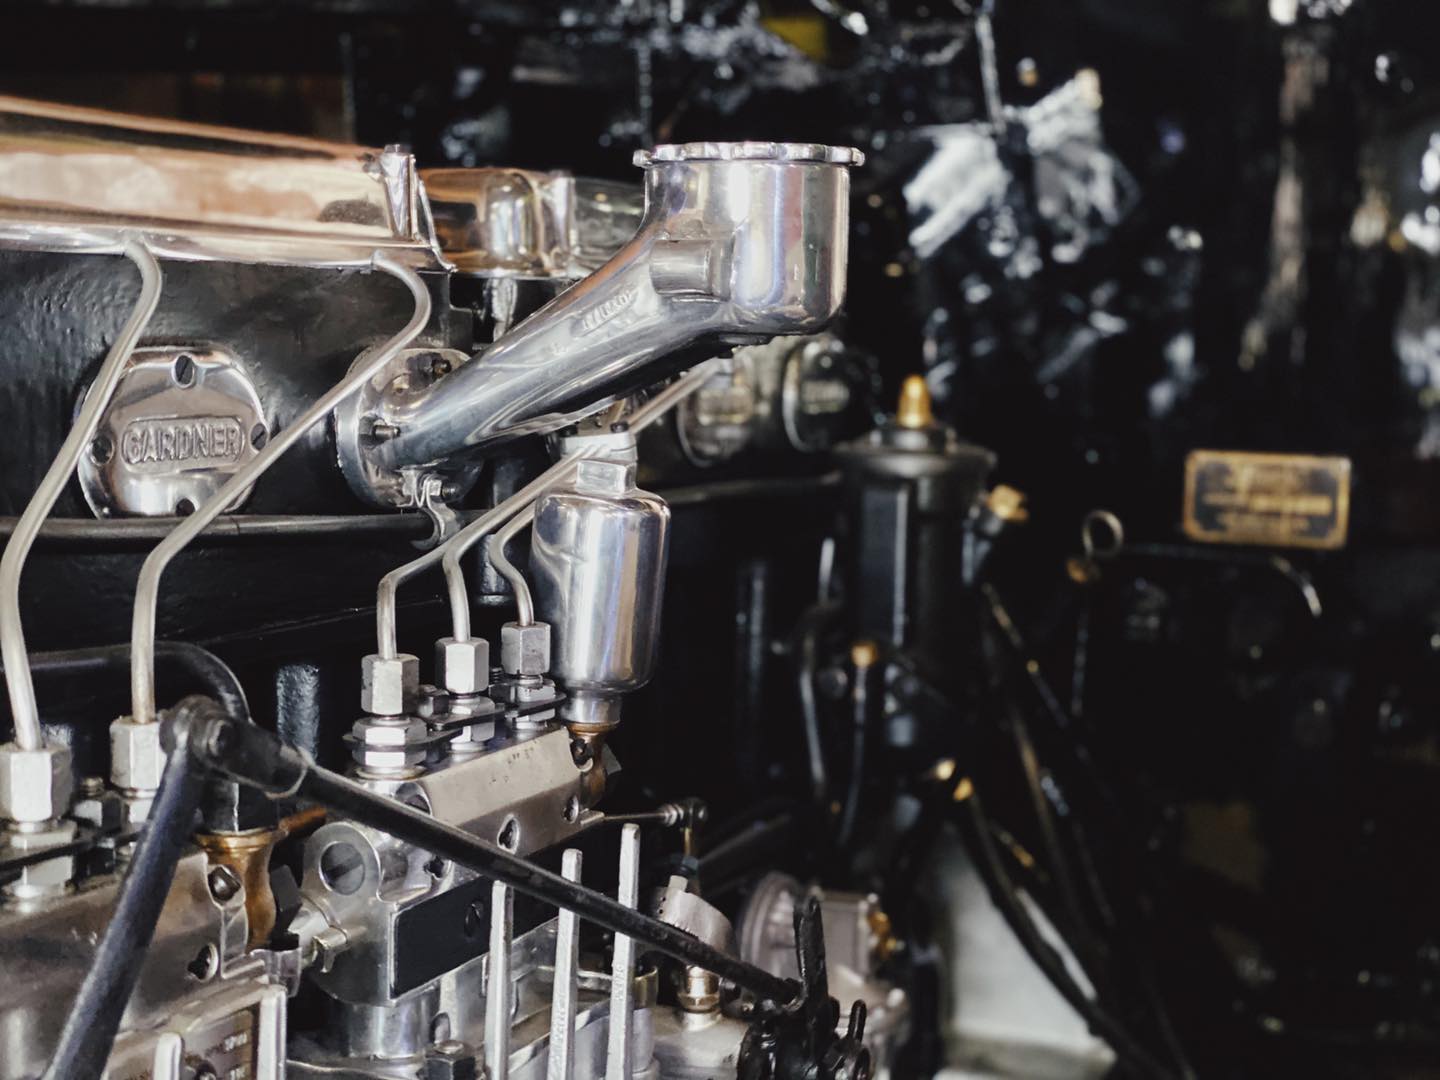
The partial restoration included stripping and repainting the exterior, sign written adverts, restoring the paintwork in the cab area, repositioning the original style number plate on the front, changing the window rubbers from black to authentic cream and altering the destination box for new blinds to be fitted. The mechanical side of the restoration included refitting a reconditioned Gardner 6LW engine, a new set of front brake shoes and passing a Class 6 MOT.
I feel that YDL is a perfect example of how enhancements such as chrome and polished aluminum and new cream window rubbers can really transform the vehicles appearance along with its shiny new paintwork and make it stand out. So if you can, try to allocate some of your budget towards these showstopping details. I promise you wont regret it and you might even need to buy a pair of new sunglasses too!

Related Posts
It’s Electrifying
14th December 2022
In this article I interview my friend and electrical guru Malcolm Green, discuss bus and coach electrical restoration...
‘AD’ to your restoration
27th February 2022
It's time to decide if you would like to have period adverts recreated and shown off on the exterior of your bus.
Engines - The Heart of Your Vehicle
20th February 2022
My first experience with engines was working on AEC’s from a young age. I was lucky enough to grow up surrounded by…
Planning Your Restoration
21st February 2022
Ashley discusses the start of the restoration, creating a plan of action for the work that needs to be carried out to…